Thursday, September 25, 2014

The Fall Garden is Planted

The other morning I was working in the garden making a straight row by stinging up a bright blue line between two poles so that I could plant a dozen rutabagas without straying too much and my husband wanted to know what I was doing.  He laughed when I told him.  "It is so not you," he said.  He was right but I thought that I would do it his way.

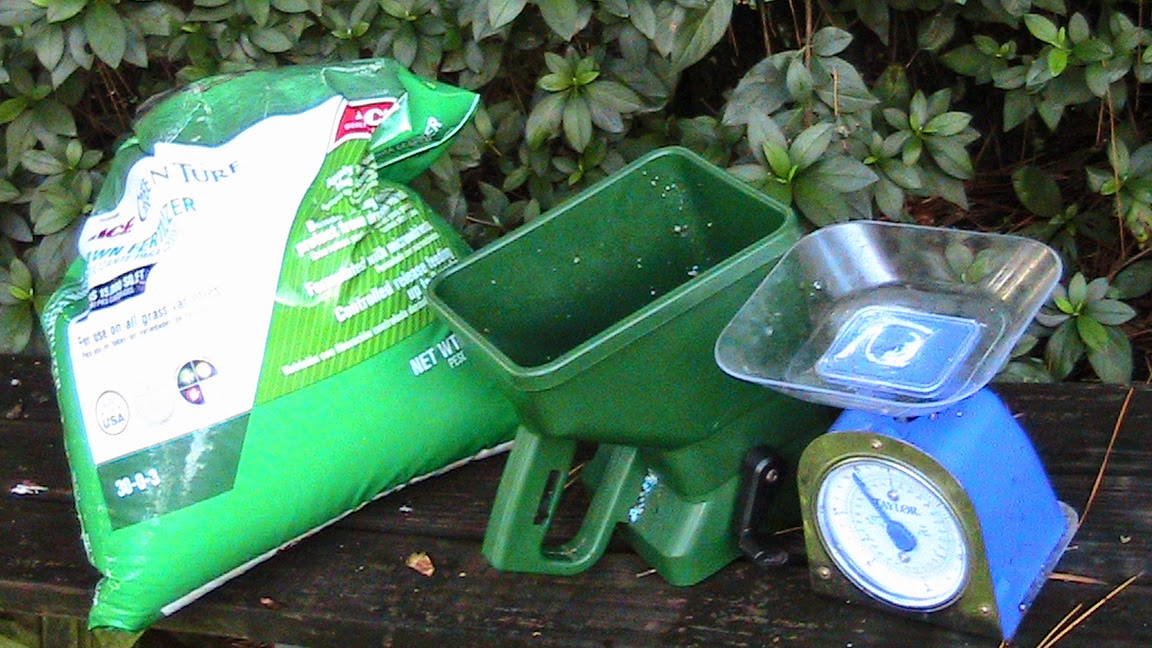
I had removed most of the debris from the black eyed pea area, turned over the soil, and smoothed it out with a garden rake.  I then dug holes for each of the rutabaga plants and added fertilizer.  My husband likes to add fertilizer at planting time; I like to wait until the plants have established themselves.

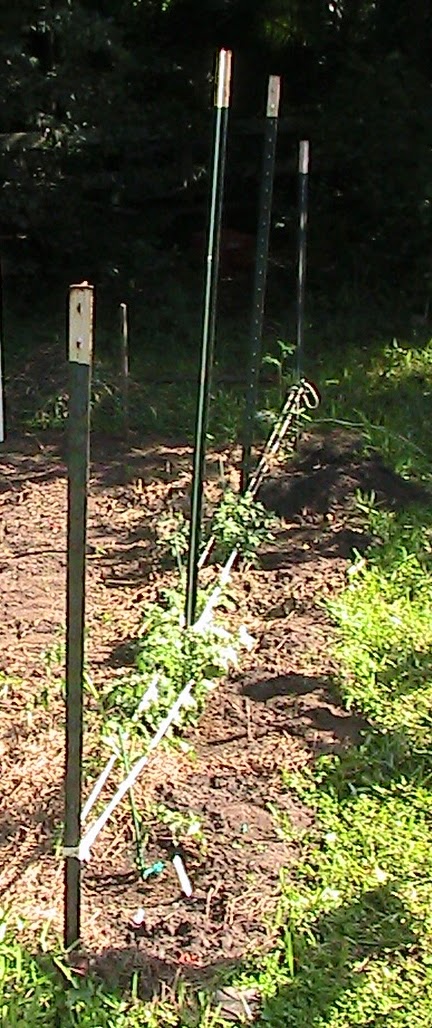
I gently informed my husband that I was going to pull up the eggplant stalks as well as the okra stalks to make room for seeds.  He told me not to do it and we agreed to leave the stalks in the ground a while longer. I always honor my husband's wishes and I also walk ten paces behind him.

Rutabaga:  I was pleasantly surprised to find rutabaga plants at the local garden center.  How nice!  Now, I don't have to sow rutabaga; however these rutabagas have red tops and I prefer all yellow rutabagas and I may still look for seeds that will mature in 75 - 100 days.  The rutabagas are drought tolerant and hardy.

Red and Yellow Onions:  I was also surprised to find onion sets at another local garden center.  I planted one row of about 30 onions, red and yellow respectively, in each of the two garden plots.  They will mature in 140 - 180 days which is a long time but we do use the onions before they are fully mature.

Other Plants:
12 red top Rutabagas that will mature in 80 days
18 Broccoli Packman Hybrid that will mature in 45 - 55 days
18 Best Hybrid Cabbage that will mature in 75 days
9  Hybrid Cauliflower (White Cloud) that will mature in 75 days

The above plants require full sunshine (6 hours daily) and like fertile well-drained soil and it would be prudent to keep the soil evenly moist.

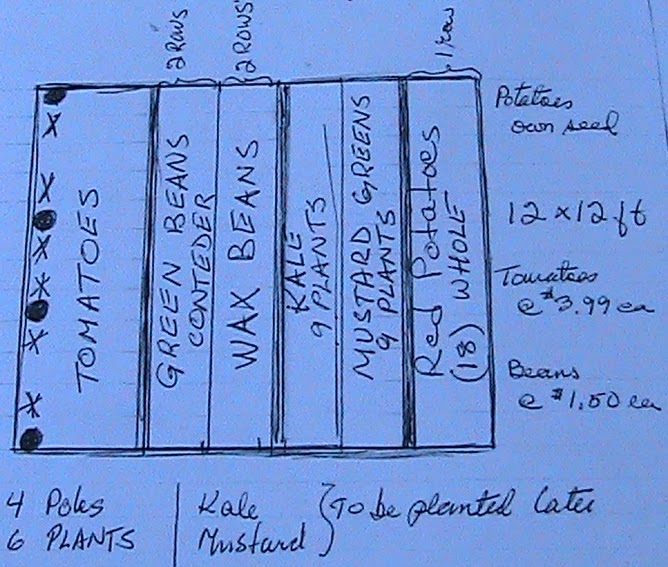
My well planned sketch had to be modified.  I planted cabbage in that plot instead of mustard greens and kale which will be planted much later in the season.  Other than that, I have visions of every plant maturing and producing beautiful and nutritious vegetables in the upcoming months.

Thank you for visiting my blog.

Monday, September 22, 2014

Black Eyed Peas

We have used various legumes as cover crops during the summers.  We have used Southern peas such as Crowder peas and Zipper peas and we have used Black Beans.  This past summer we used Black Eyed Peas and they turned out to be a delightful surprise.

 It is logical to believe that the black eyed peas were transported from West Africa by the slaves to Virginia in the 17th century.  The black eyed peas are mostly grown in the South and are considered a soul food.  A cup of cooked peas provides me with calcium, folate, protein, vitamin A for reduction of my wrinkles, and fiber to keep me regular.  What else do I need?

Not only are the black eyed peas good for my soul, they are also good for my soil.  These legumes are considered a hot weather crop and should be sown in late spring or early summer.  I happened to sow the peas in rows but my husband says that you may broadcast them too.

The black eyed peas make for wonderful ground cover. They spread quickly as low ramblers and covers the ground and thus hold down the weeds.  They also attract  bees and other pollinators and add nitrogen to the soil.

Unfortunately, the black eyed peas are susceptible to root knot nematodes and that is one of the reasons that crop rotation is important.  I prefer to pull up the plants from the ground as soon as possible after the harvest is completed.

Husband's grandfather mashed up cooked peas with a few slices of fresh tomatoes mixed with a touch of vinegar and sugar to taste.  Some people cook the peas with a piece of smoked pork.  I prefer to cook the peas and enjoy their natural taste which is surprisingly good.

The black eyed peas are easy to pick and easy to shell.  I just put a pound of them into the freezer for later.  I blanched them, cooled them under running water, and packed them into a plastic bag.  They had a delicate green color in at least fifty shades.

Thank you for visiting my blog.

Friday, September 19, 2014

Early Morning on the Beach

Early yesterday morning, I left the Back Forty behind and kept walking to the beach and I reached the dunes in time to see a spectacular sunrise.  I sat on the dunes among the sea oats and watched the sun rise and listened to the waves come crashing onto the sand leaving a few shells for me to collect.


Please, come and visit the beach often, take pictures and make memories, and only leave your footprints.  Enjoy the day.  Tomorrow is another day for gardening.

Thank you for visiting my blog.

Wednesday, September 17, 2014

Lawn Care for the Fall

A few years ago, we did have our soil tested by the local Cooperative Extension Service and this is their recommendation for the high maintenance of St. Augustine grass for our yard in north east Florida and this is the last fertilization for the year, the fall feeding.

The Extension Office recommendation is to use a "complete fertilizer" at 1.0 lb of nitrogen per 1000 sq.ft. for the September lawn care.  The most important aspect of fertilization is to know how many square feet will be covered and the only way to find that out is by measuring the yard so that we will know how much fertilizer to buy.  We stake out our yard in twelve foot swaths using tent pegs and flags as markers.

We are using a fertilizer consisting of 30% nitrogen, 0% phosphorous, 3% potash, and the rest is filler.  Some recommend that the potash match the nitrogen and it is believed that there is enough phosphorous in the ground already. Putting down additional potash is costly and maybe not worth it.

Now, I have to remember that I only have 33% of actual "fertilizer"--the rest is filler; so, if I had a 100 lb bag, I only have 33 lbs of fertilizer (30-0-3).  Therefore, I have to figure the square footage and then I need 1.0 lb of nitrogen per 1000 sq. ft.  (The nitrogen is the first number.)  Go ahead, do the math!  In this case, it means that I need 3.3 lbs of fertilizer per 1000 sq. ft.

We use a hand held spreader that covers a 12 foot wide swath and we walk back and forth in a steady pace to distribute the poundage of fertilizer/nitrogen.  We weigh the fertilizer using a simple household scale.  When one section is done, we continue to the next section that has been measured and staked out.  The tent pegs or flags serve as guide (so that we know where we have been and where we are going).

We strongly recommend that this fertilizer be kept in a dry place, preferably inside, or it will absorb the moisture from the air (believe it or not) and turn rock hard.

When we do use the fertilizer, it is free of herbicides and pesticides.  We do not want to destroy the dollar weed and violets nor kill the bugs, small grasshoppers and white flies.

We take care not to get the fertilizer onto the street to prevent it from being washed away into the drain and the watershed.  We also have the city's right of way between us and the scenic creek that does not get fertilized; it serves as a buffer.

Finally, we check the weather forecast.  We don't want the heavy rain to come and wash it away but we usually water the lawn after fertilization.

A gardener's work is never done.
Thank you for visiting my blog.

Tuesday, September 16, 2014

Banded Sphinx Moth

I was resting on the bench after a hard morning's work in the garden when I noticed a huge moth on the corner of the tented gazebo.  It was shaped in a triangular fashion and not particular colorful.

Not much has been written about this moth other than it belongs to the Sphingidae family and feeds on nectar from flowers.

The larvae is more colorful in green, yellow, and pink bands and stripes.  I have not seen this larvae in my yard.  The moth is at home in warmer climate but has been spotted as far north as South Carolina.


At first sight, this moth may also be mistaken for a butterfly.  Some have said that it reminds them of hummingbirds feeding from flowers or feeders.

Keep your eyes open; you never know what you may find in your own backyard.

Thank you for visiting my blog.

Thursday, September 11, 2014

9/11 Heros

A chaplain, who happened to be assigned to the Pentagon, told of an incident that happened right after Flight 77 hit the Pentagon on 9/11.

A daycare facility inside the Pentagon had many children, including infants who were in heavy cribs.  The daycare supervisor, looking at all the children they needed to evacuate, was in a panic over what they could do.

There were many children, mostly toddlers, as well as the infants that would need to be taken out with the cribs.  There was no time to try to bundle them into carriers and strollers.

Just then a young Marine came running into the center and asked what they needed.  After hearing what the center director was trying to do, he ran back out into the hallway and disappeared.  The director thought, "Well, here we are on our own."

About 2 minutes later, that Marine returned with 40 other Marines in tow.  Each of them grabbed a crib with a child and the rest started gathering up toddlers.

Once they got about 3/4 of a mile outside the building, the Marines stopped in the park and then did a fabulous thing:  they formed a circle with the cribs which were sturdy and heavy.

Inside this circle of cribs, they put the toddlers to keep them from wandering off.  Outside this circle were the 40 Marines forming a perimeter around the children and waiting for instructions.

They remained there until the parents could be notified and come and get their children.

The thought of those Marines and what they did and how fast they reacted; could we expect any less from them?  (From an e-mail sent to me.)

Support the wounded Marines and other service men and women by checking out The Long Trail Home on Facebook and donating to the Marine Semper Fi Fund as found on their WEBPage.


God bless.
Thank you for visiting my blog.

Wednesday, September 10, 2014

Planting Tomatoes for Fall


Planting tomatoes have always been a challenge mainly because there are so many varieties.  We have recently planted tomatoes for the fall and so far so good.  Some gardeners are successful while others struggle with the tomato plants this time of the year.

One of the problems with tomatoes is staking them up.  The wire baskets are out of the question because the tomatoes are too heavy and will get cut on the wires.  We have tried flexible fences and we have tried wooden stakes but the tomatoes are still growing ever which way.

A few years ago, we visited Orr's Farm outside of Martinsburg in West Virginia and found that they had staked up their tomatoes using poles (similar to those shown in the picture).  The idea is to run the twine or soft rope from pole to pole, down one side and up the other side. What a great idea!

As the tomatoes grow, we make additional lines of soft rope. This keeps the tomatoes from breaking and it also keeps them off the ground.  It also gives us plenty of room to walk around the row of tomatoes to pick them, fertilize them, and remove dead leaves and rotten tomatoes.

Furthermore, it also frees up space in the garden.  We don't expect frost nor freeze for the growing time for our fall tomatoes in the north east Florida area.  The tomatoes will receive full sun for at least six hours daily.


Some home gardeners may want to grow the tomatoes in containers on the patio or near the house and be able to move the containers as necessary.  It is also recommended that tomatoes that produce small fruit be grown for the fall e.g. plum tomatoes and Roma tomatoes.

If tomatoes are still available at garden centers, buy plants with hefty stems and good green foliage and when you get home, plant the tomatoes deep to keep them from flopping about.

Thank you for visiting my blog.

Tuesday, September 9, 2014

SCAM ALERT

A few weeks ago, General Cartel Ham's picture and a request to be added to my circle appeared on the Bell shaped Google & Notification icon.  Most of the time, if not all of the time, I ignore those requests thinking that if you want to follow me, you add yourself.

I don't know what you see on the Google & Notification when you open it.  This time I decided to add a few people and among them was General Ham.


When I saw his name and picture, my first thought was:  What the heck is  doing reading a garden blog and why does he want to get in touch with me?  A few bells went off!

I researched the General and he does exist; however, there are many scam alerts involving him.  This is how it goes:  The scammer is stealing his picture!  General Ham is a public figure and his picture is scattered all over the internet and it is very easy to steal his picture and transfer it.


I have not heard anything more from "General Ham".  Yeah, I am curious enough to check this out.  When you see something that does not sit right with you, weed it out.

Be cautious.
Thank you for visiting my blog.

Friday, September 5, 2014

Planting Sketch

While it is still too hot in Northern Florida to set out vegetables plants in the garden, it is never too early to plan and visualize the garden plot.  My husband planted five tomato plants:  Heirloom on one side and Cherry at the other end.  In between, there are Roma, Beefstake and Better Boy plants.  We are still looking for Yellow Tomatoes.  The rows run from north to south.

Garden Sketch
I planted nineteen (19) whole potatoes that had gone to seed from this spring's harvest.  The potatoes had well developed eyes and the potatoes were free from cuts and bruises.  This is the first time that I have planted potatoes in the fall.

Snap beans or green beans with the name of "Contender" were sowed in a double row next to the tomatoes and they were followed by Wax Beans.  The beans should mature in 40 to 60 days.  I can't go wrong with beans.

I have also made room for nine (9) plants of Kale and nine (9) plants of Mustard.  I was impressed with how well plants did last season, providing a bountiful harvest.

I don't feel the need to have the soil test because I have added so much composted organic matter as well as green manure to the otherwise sandy soil.  Before I planted the vegetables in the rows, I sparingly added regular garden fertilizer (6-6-6) and trace elements.

Last time this particular plot was used, we had corn growing and before the corn we had potatoes growing and they are heavy feeders, meaning they use a lot of nourishment; therefore, it is important that these areas be supplemented.

Thank you for visiting my blog.

Tuesday, September 2, 2014

Continued Preparation for the Fall Garden

There is nothing "cute" about my garden.  It is not particularly well defined nor is it boxed in:  sometimes, another row is needed for plants that caught my fancy at the garden centers.  The rows have a tendency to wobble and the weeds sometimes take over; however, I do have a working garden--a garden that provides us with all the vegetables we need.

Now that you have found a good location for your garden, there are just a few more things to consider before your soil is ready to welcome your plants and seeds to make them grow and flourish.  You have measured out the size for your garden and you have ensured that your plants will have at least six hours of sunshine each day.

A Garden gone Wild
Composting:  A rather simple way of providing organic nourishment for your garden is to make your own compost.  No elaborate and expensive bins or boxes are required.  Designate a special area for your compost and make sure that it is near your garden.

Grass clippings, free of herbicide and pesticide, are a basic component for your compost pile and adding organic matter from the kitchen including egg shells and coffee grounds.  Leaves and pine needles are also good for the compost.  Make sure that you turn the compost often or the grass clippings will mat.

Mulching:  Once your seeds and plants are in the ground, consider mulching around the plants to keep the weeds at bay, keeping the plants moist, and conserving the water as well.  It is recommend that you leave some space free and clear around the stems of the plants.

Watering:  Hopefully your garden is also located near a source of water for your convenience.  The most important thing about watering is consistency.   It is more beneficial to water longer and deeply than often.  If possible, water from the ground--let the water soak in around the plants.

        Let's take a break and enjoy a few more weeks of summer and continue to wear white and flip flops.

Thank you for visiting my blog.

Monday, September 1, 2014

Potato Skins

I went to the local grocery store the other morning and started to read one of their sales paper.  A recipe for potato skins caught my interest and I already had most of the ingredients at home, certainly the red potatoes.  Now, why did I come to this grocery store?

When I came home, I went through the box of potatoes that would do so well for this recipe that called for red potatoes.  These left over small potatoes were from the garden, harvested in April, and had lasted through the summer.  Deem of my surprise when I found that the potatoes had sprouted and were ready to set in the ground and not in the oven.

Red Seed Potatoes for Fall Planting

I had never heard of potatoes being planted in the early fall so I checked it out and the consensus was:  plant away as long as the potatoes are free from cuts and blemishes..  I plan to set them out before the week is over and they should be mature in three months or in time for Thanksgiving.

Here is the recipe for Potato Skins:
1 pound of red potatoes or whatever you have on hand, boiled until soft, and cut in half
4 slices of bacon, again whatever you have on hand, fried crisp and crumbled
8 ounces of cream cheese
Chives (optional) for decoration

Scoop out the interior of the potatoes into a medium bowl and arrange the shells on a baking sheet.  Mix the scooped out potatoes with cream cheese and bacon.  Spoon back into potato shells and bake at 350 degrees F for 15 minutes.  Top with chives and serve hot.

Enjoy Labor Day and your potato skins; I will enjoy mine.

Thank you for visiting my blog.