Monday, September 30, 2013

PH Testing

It is a good thing to have your garden soil tested to find out the PH value of the soil before you start planting your garden.  The PH will give you an indication what the soil needs to produce a bountiful crop.  This test is available at any local agricultural extension office and it is usually free.

To get the most accurate result, take several small scoops of soil from various areas in the garden bed and mix them together.  Dig down about 6 to 8 inches for each scoop.  A quart of the soil is needed for the testing.  The PH test is finding out the "potential of the hydrogen ion in the water (Clemson University).

According to a report from Clemson University in South Carolina, most Southeastern soil range from 4 to 8 in PH value.  The learned staff at the University claim that the tests are easily measured using a PH meter (!) and an electrode for the most accurate result.  Using color indicators and litmus paper are quick alternatives for less precise results.


Let the soil air dry before placing it in a plastic bag marked with your name, phone numbers, and e-mail.  I would also put the date the soil was taken and where it was taken from in the garden.  I would also let the extension agent know what you have planned for the tested area.  This is not so much for them but certainly for your own records.

Depending on the outcome of the soil test, your extension agent should be able to tell you what you need to amend the soil in your garden.  The soil may contain too much acid and needs to be neutralized with lime.  Or it may be too sandy and in need of organic matter from you own compost or commercial compost from a garden center.

Clemson University does have an interesting and informative article on this subject.  Check them out!

Thank you for visiting my blog.

Thursday, September 26, 2013

Herbs for the Fall Garden

Looking through my garden bag that I received from the Nature Conservatory for a small donation, I found a few tools that may come in handy in the garden and many gloves for my left hand.  There were several plastic bags filled with envelopes  for herbs, vegetables, and sun flowers.  The packets with no expiration date have got to go and the same with packets not purchased for this year.


To plant herbs, it is imperative that the soil be nice and smooth.  It should be free from debris and compost that have yet to turn into black gold.  The seeds are so small and it will be so much easier for them to germinate in a friendly environment.  I do not use fertilizer for the herbs at this time; I let them get established.  Most herbs require plenty of sunshine but they are adaptable.

I am not endorsing any seed company but I like Burpee because their seeds are double bagged.  I found some of my favorite Burpee herbs in the bag:  dill, parsley, and sweet Basil.

Dill (Mammoth):  Burpee recommends that the seeds be sown in clumps when growing for leaf production.  Scatter the seeds onto the soil, cover with 1/4 inch fine soil and tap it down gently.  Seedlings will appear after 10 -21 days.  They still need to be thinned but not as much as when harvesting seeds is the goal, then thin seedlings to grow 24 inches apart.  I consider it a big bonus if I get any blooms that will materialize into seeds.

Basil (Mammoth):  Burpee recommends that the seeds be sown 6 inches apart and covered with a quarter of an inch of soil.  Good luck on seeing the very small black seeds in the soil.  I went ahead and sprinkled the seeds onto the soil and tapped them down gently.  Seedlings will appear after 7 - 14 days.  Basil also requires room to grow.

Parsley (Extra Curly Dwarf):  According to Burpee, the parsley may be sown from early fall to spring.  Apparently parsley is a cold weather crop.  Seedlings will emerge after 14 - 21 days.  Broadcast the seeds and cover them lightly andr tap them down gently.  The seeds are beige/brown and easy to see in the soil.  When seedlings are a few inches high, thin to stand about 6 inches apart.

At this time, I have Rosemary growing in the herb garden.  I trimmed it up a bit and gave it a small amount of common garden fertilizer (6-6-6).

 I also have a clump of oregano that is holding on.  While trimming it, I found it consisted of two plants.  I separated them and planted them a little deeper so that it would not be too easy to pull up.  They also received a small amount of fertilizer.

In addition, I have a Sweet Basil plant that is still producing leaves enough to go with a tomato or even two.  I've been told that I should trim down the basil to about 6 inches above the ground and it is supposed to survive and flourish.

There is still plenty of work to do in the garden and I still have more seeds to sow.  Later.  Have a great weekend.


Thank you for visiting my blog.

Wednesday, September 25, 2013

Tall Reeds

I read with interest what the Master Gardener wrote in the local paper about tall reeds in the Northern Florida.  It concerned me because he claimed that they were invasive plants.  Thank goodness, we do not have any reeds in the Back Forty Park; however, we still have to be vigilant against invasive plants.

Seeds from trees, bushes, flowers, and grasses are easily spread by animals and humans.  The seeds cling to the animal's fur and our clothing to be dropped. The seeds are also spread by the wind and the birds spread the seeds as well.  Once you have invasive plants, they are difficult to eradicate.

As an experiment, the Master Gardner let a stand of reeds grow in his yard where he could somewhat control the plant's environment and observe how the reeds did during the seasons.  The reeds did very well; too well.  He found that when he tried to dig up the reeds with a sharp shovel, the rhizomes were hard as rock.

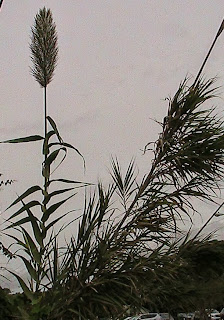
The tall reeds are also known as Giant Reeds.  They are grasses that grow up to 12 feet tall.  The stalk can be an inch thick and the leaves are long, sharp, and greenish.  The leaves resemble blades.  The Common Reed is native to Florida and may be found on marshes or other waters.  This plant spreads quickly by its rhizomes and seeds.

The Burma Reed or the Silk Weed is found in Southern Florida and it is listed on the Florida Noxious Weed List.  It means that it is unlawful to introduce, multiply, possess, move, or release this plant without a permit issued by the state.  The Burma Reed was first introduced as an ornamental plan (University of Florida IFAS).  Although the reeds are attractive, be vigilant.


The above picture shows the invasive air potato making its way to the end of the reed's "tassel"-- double trouble.  Honestly,  by looking at pictures of the various reeds, I cannot tell the difference between the different reeds:  I would consider them all as invasive plants.

Thank you for visiting my blog.

Tuesday, September 24, 2013

Fall Vegetable Plants

When I was looking for plants to set out in the garden for this fall, it seemed that the big box store had the same kind of leggy herbs and vegetables it carried all summer.  One of the home improvement centers had nice looking trays of red cabbage at a nice price.  Most of the plants, we got at the seed store down town in Jacksonville, Florida.  We selected the following plants:

Two (2) boxes of Green Cabbage @ 9 plants in each.  The cabbage was planted in a row in the garden near the raised box.  They will mature in 75 - 120 days.

Two (2) boxes of Packman Broccoli @ 9 plants in each.  They were planted in two rows in the garden next to the cabbage.   They will mature in 100 - 130 days.

One (1) box of White Cloud Cauliflower @ 9 plants.  They were planted next to the broccoli.  They will mature in 120 - 150 days.
Cabbage
One (1) box of Georgia Collards @ 9 plants.  Some of them were planted at the edge of the garden.  They will mature in 60 - 80 days.  Believe me, we don't need nine collards.  They were not available in pots with only one plant in each or six plants in one box.

The collards keep producing well after the 80 days when the lowest leaves are harvested.  Some like to cook the collards for a long time and season them with smoked meat.  They are nutritious and delicious with the watermelon rind pickles made earlier this summer.

What a great wayto spend the day at the beach.  Instead of making castles in the sand, we made furrows in the soil.   Excuse me while I limp to the porch to take my muddy shoes and socks off so that I may go inside and collapse.

Thank you for visiting my blog.

Monday, September 23, 2013

Fall Vegetables Sowed and Planted

What happened?  I've been waiting for fall and cooler weather to plant my vegetable garden and now I find that there are very few plants available and the seed packets are dismally displayed in the various garden centers.  Did I miss it?  I've been to the home improvement centers, garden centers, and big box stores and they are getting ready for Christmas!  I found most of the seeds at the store with the helpful people.

Before we could sow the seeds and plant the plants, we had to clear the garden plot, remove roots and debris, and turn the soil.  We made furrows and we added compost from our pile as well as commercial compost and moisture control garden soil.  So far the following seeds have been sown in our garden on the Back Forty.

Contender Snap Beans will germinate in 6 - 8 days and mature in 40 - 60 days.  The suggestion on the seed packet advises that working around the beans when wet may spread disease.  It also suggests that when weeding to hoe and pull gently around the plants because they have shallow roots and to mulch to conserve water and prevent weeds from appearing (Ferry-Morse).  The snap beans have been sown along the edges in the newly raised garden box.

Carrots germinate in 8 - 12 days and mature in 70 - 75 days.  Ferry-Morse claims that too much watering may cause the carrots to crack.  They also suggest that the carrot bed be kept free from weed and that the exposed roots should be covered lightly with soil.  The carrots have been sown in the bean patch along the scenic creek.  The long slender carrots are in the middle of the row with the short and stocky carrots on each end.

We have a problem on the Back Forty.  I should have named it "Back and Forth Garden."  My husband and I have different ideas about gardening.  If you ask us a question, most often you'll get a different answer; however, I defer.  Keeping in mind that it is just the two of us, do we need all these vegetables?

At another garden center, we bought four (4) bags of onions to set.  We bought red and white onions.  We bought regular yellow onions.  They may be multiplying onions.  Finally, we bought sweet onions.  They are also yellow but oblong in shape.  The onions were divided up and planted in rows on the outside of the carrots in the bean patch.  I will keep it a secret of how many onions were planted all together.

Stay with me, there are more vegetables to be planted another day.

Tip of the Day:  Another gardener was also buying onions at the garden center and we got to talking about storing the onions when they mature after 140 - 180 days.  He said that he pulled up his onions, put them in a bucket, and covered them with an old T-shirt.

Thank you for visiting my blog.

Thursday, September 19, 2013

Building a Raised Box for Gardening continued

We had the lumber cut to build the 8 x 4 foot raised garden box at the home improvement center.  My husband then measured and marked the exact points for the screws to be drilled into the wood to connect the boards to the legs at each corner.  The boards are eight (8) inches wide, not 1 foot as I previously stated.

Completed Raised Garden Box
It is important to have the box leveled so that the water and nutrients will be evenly distributed and to prevent mud puddles.

My husband, the engineer, used a level for this purpose, what else?  He used a large "square" to make the corners square!  Gee!  I shall leave this subject while I'm still ahead.

The long sides were screwed to the posts leaving 1.5 inches for the end boards.  This was constructed on a flat surface and then hauled to the garden site where the end boards were screwed to the posts.  The box is now complete.

Mr. Blue Jeans
The summer's ground cover of black beans and peanuts were mowed down and the roots removed.  I dug out some of the dirt from the box.  I turned the remaining soil in the box, raked it, and leveled it.

My husband then added agricultural sulfur to the soil in the box to deter nematodes.  Compost from our own pile and the original soil was put into the box; topped off with store bought organic compost and moisture retention garden soil.  The newly constructed raised garden box is now ready for fall planting.

Two rows of red cabbage plants were set in the middle of the box flanked by a row of Contender snap beans on either side.  It may be a little crowded but the snap beans are supposed to germinate in 6 - 8 days and ready to harvest in 55 days.  The red cabbage will mature in 75 - 120 days.

The crop is in the box and a gentle rain is falling.  The garden box is perfectly aligned with the northern end of the bean poles.  The full moon will rise at 7.30 tonight. and the man will smile with pleasure upon our garden, I am sure.  I am not sure how the stars are aligned.

Thank you for visiting my blog.
Have a wonderful weekend.

Tuesday, September 17, 2013

Building a Raised Box for Gardening

Growing vegetables in a wooden container box gives us more control of the kind of soil, nutrients, and amendments used.  It gives us easier access to remove weeds and check for insects and diseases.  It is also easier to hand water the garden when needed.

My husband and I have been talking about gardening in a raised box but we have always disregarded the idea until recently.  The idea of having a box for growing our vegetables in has slowly grown on us.  Last Friday morning, we bought pressure treated lumber from a home improvement center to build an 8 x 4 foot box for less than $50 including screws for the wood.  We decided on pressure treated wood because of its durability.

The improvement center associate cut the lumber for us at no extra cost.  We had him cut one of the 8 foot long boards in half to be used as ends.  He also cut the two 2 x 4 x 8 pieces in half to be used as "legs" in each corner.

We wanted to have legs in each corner of the box.  One foot of each leg would go into the ground for stability.  Another foot would house the box itself.  This would leave two additional feet for future use.  We could easily add another box and secure it to the legs.

Material Used for a Garden Box
In addition, we could easily cover the box with a frost blanket if needed and secure it to the legs.  Or we could use the legs to secure a sun screen during the sunniest part of the growing season.

Raised boxes may of curse be constructed with less expensive material and without legs and in various sizes.  This is the material we used for an 8 x 4 foot box:

Three (3) 2x8x8 ft Pressured Treated Weathershield
Two (2) 2x4x8 ft Pressured Treated Weathershield
One (1) box of 3" Exterior Screws (for pressured treated wood)

I started to question the safety of pressure treated wood not that our box is almost completed.  What if the chemicals used to treat the wood should leach out into the soil?  What affect would that have on the soil and the vegetables?  To find an answer to my nagging concern, I checked with the YellaWood and found the following:

Scientific studies have proven that any copper that may migrate from the treated wood becomes biologically inactive, thus causing no eco-toxic or other environmental impact.  YellaWood products are gentle enough to be used in raised gardens and durable enough to provide long-term protection.

The building of a raised garden box will continue.

Monday, September 16, 2013

Pineapple Jam without Pectin

I have had this pineapple in the fridge for a long time and I have so much other fruit to eat; consequently, something had to be done with the pineapple.  Since I've been on a roll in the kitchen most of the summer, why not make pineapple jam?  I'll give it a try.  It's better than a juicy pineapple ending up on the compost pile.

I removed the green top by simply twisting it.  Sometimes it comes off very easy using this method but mostly I end up using a sharp knife.  I proceeded to cut the fruit lengthwise, making slits crosswise and finally cutting the chunks away from its skin.

Pineapple Jam
The chunks needed to be chopped into even smaller pieces.  I did not want the chunks to be too big in the finished jam.  One pineapple makes four (4) cups of juicy chunks.

I added two cups of sugar to the pineapple chunks and let it come to a boil, stirring often.  Some recipes call for a cup of water.  I did not add any water.  I let the fruit simmer for about 40 minutes, not forgetting to stir often to keep the fruit from sticking to the pot.

When the jam was ready, it thickened and turned to a darker color.  It had cooked "down."  It yielded a scant two cups of golden delicious pineapple jam.  Wow!  Was this yummy or what?  It was a sweet jam.

As usual, I sealed my one jar with hot wax for use later and the rest was eaten.  I now believe that I am through jamming, at least for a while.

Thank you for visiting my blog.

Friday, September 13, 2013

West Virginia Pear Jam without Pectin

I am still resisting going out into the garden to do some serious work after a long summer hiatus.  I did go out early yesterday morning to clear some sweet potato vine from the fringe of the woods.  My feet got wet; my garden gloves got soaking wet; and the sweat was running down my back.  The humidity was higher than the temperature.  Dark clouds were nearing and so was the thunder.  The sun was still shining but it was time to go inside.

Orr's Farm Market
We expanded our recent trip to include the 1,000 acre Orr's Farm Market in West Virginia, just a few miles north of Winchester VA and off I-81.

This is one huge farm providing fruits and vegetables for the local community since 1954. Tourists have also found their way to the Farm. This time peaches, plums, apples, and pears were ready for harvesting.

The farm is situated in the valley between the Blue Ridge and Appalachian Mountains. It is fantastic to see such an abundance of fruit in one place.  The fruit and vegetables are picked for you but berries are available for your own picking.

Pear Jam
Today I removed the seeds from five (5) medium sized pears and finely chopped the pears to measure four (4) cups.  I preferred to leave the skin on the pears.

I combined the chopped pears with two (2) cups of sugar and let it come to a boil, stirring often.  Once the sugar was dissolved, I let it simmer for about 40 minutes. I kept on stirring often while simmering.

It is easy to double this recipe or even triple it. Adding some cinnamon pieces and a few whole cloves will give the jam an interesting taste.

Finally,I poured the hot jam into clean jars and sealed the them with hot wax.


There is no doubt that I have left a bit of myself in the mountains of Wild Wonderful West Virginia with its kind people, beautiful scenery, flora and fauna.

Thank you for visiting my blog.  
Have a great weekend.

Thursday, September 12, 2013

Back to the Garden and a Hawk

Today my husband took the newly repaired lawn mower and cut down the butter bean wines.  They were no longer producing.  I dug around the furrow with the shovel, pulling up the roots, and added mulch from the compost pile.  For the time being, the compost will keep the top soil from blowing away and if it rains, the compost will keep the dirt in place.

I was feeling a twinge  for neglecting the Back Forty and the Park; consequently, I decided to go out and remedy the neglect.  I pulled on my garden gloves and ventured out to where the cedar trees are being overtaking by a diverse fauna.

Red shouldered hawk
I bent down down on my knees and started to pull the weeds only to get up to follow the Virginia Creeper to see how far up the cedar tree it went.  Oh, my gosh!

I found myself staring, eye to eye, at a red shouldered hawk.  The hawk wasn't particularly big; it must have been the male.  I understand that the female is the larger of the two. Whoa!  Big Boy!  Let me go in and get the camera, forget about this weeding, and hawk you stay put.  Sure enough, he did.  This is the best picture.

What a wing spread!  The hawks mate for life and come back to the same location.  They feed on mice, snakes, frogs, and other small critters.  They provide such an ecological balance to the Back Forty so they are most welcome.  This hawk has visited the Back Forty many times in the last few weeks. Hopefully he will stay now that he knows this is a wildlife sanctuary.

Thank you for visiting my blog.

Wednesday, September 11, 2013

Remembering September 11th


The sky was clear blue and the sun was shining so brightly on this very day in 2001.  The air was crisp with a hint of autumn.  It was a perfect day.  I was day dreaming as I rode the shuttle by the Pentagon.

It wasn't a dream that the World Trade Center complex had been hit.  It was no dream that the Pentagon had been hit.  It was no dream that a plane went down in a field in Shanksville, PA.


Let us not forget.

Tuesday, September 10, 2013

Virginia is for Apple Lovers

My husband and I recently stayed in Winchester VA and we had a breathtaking view  of the setting sun over the hazy blue mountains.  We have earned many blisters walking the Appalachian Trail in Virginia.  Did I say that Virginia is for lovers?  Does that include hikers?  Yes, indeed.

Virginia has the mountains and the beaches.  Last weekend there was an exciting NASCAR Race but a bit controversial.  How about the college football game between Oregon State and University of Virginia?  It did not go well for the Cavaliers.

In Winchester, there was a quiet remembrance of one of Virginia's best known and best loved country singer--Patsy Cline.  She was born 8 Sept 1932 and died in a plane crash on 5 Mar 1963.  A bell tower has been erected in her memory at the Shenandoah Memorial Park in Winchester.  The bell plays hymns daily at 6.00 p.m, the hour of her death.

Virginia is also known for its apples and you can still pick your own.  I have made too much jam this season, but I still have room in the freezer for some apples.

To prepare a syrup for the apples, heat 4 cups of water with 2.5 cups of sugar.  When the sugar s dissolved, add 1/2 ascorbic acid powder and stir.  Remove from heat and let the syrup cool.

In the meantime, slice about 3 pounds of apples and remove the core.  I prefer the Gala apples and I do not remove the skin. The Gala apples are firm and have a nice color.

Finally, pack the apples with the syrup in plastic containers or in zip lock bags and put in the freezer where they could last until next season.

Thank you for visiting by blog.

Friday, September 6, 2013

Grandparents Day

Last year, our son invited us to celebrate Grandparents Day with kindergarteners, including our granddaughter, at their school.  I have never seen so many 5-year olds in one place and furthermore I have never seen so many grandparents coming from near and far to attend a thirty minute visit.

The children had only been in kindergarten for a few weeks and they came bursting in to the cafeteria in such an orderly manner, mind you, stretching their necks, eyes darting and scanning the room for their grandmothers and grandfathers.  I was also craning my neck to see my granddaughter in a sea of kids.

Margareta
The tables were decorated with place mats created by the gifted kids and I received a handmade card with a picture that so truly depicted the essence of me.  But such are the children:  directly to the point--their brains have not mastered censorship yet.  There is no telling what will happen on the upcoming Grandparents Day.

When my granddaughter was visiting last summer, we spent time in the garden harvesting carrots, beans, and onions.  She was most interested in making that excursion to the Back Forty to see what we could find.  She must have told her art teacher about her grandmother and the garden because the following text was glued onto the card albeit upside down.


Some \time ago, my granddaughter and I waited patiently in a line when I told her that we were also taking in the sunshine with the very important vitamin D that is so good for our health and well being.  Ever since, she has talked about sunshine and vitamin D and just to check, I wanted to know how she got that information.  "You," she said.  Some things stick with the kids while other things are best forgotten.

The teachers, aides, and volunteers had gone all out to make Grandparents Day a celebration.  They had decked out two, or was it three? long tables with fruits, cakes, cookies, crackers and cheese, along with other delicious finger foods.  There was plenty of coffee, tea, and juice to drink.  Flowers, plates and napkins were also so nicely color coordinated and displayed. It was a feast for the eyes and the palette.

Granddaddy, the tractor cat, and I are making plans for the upcoming trip to celebrate another Grandparents Day with the children at the Green Ridge and we are indeed looking forward to this very important event.

If you are a grandparent, I hope that you will spend some time with your grandchildren
You are such a necessary part to the children's growth and well being.
Thank you for visiting my blog.

Tuesday, September 3, 2013

Playful Armadillos

When my husband and I were sitting at the old picnic table working on the low boarder fence, we heard this heavy trampling in the woods.  We couldn't see anything or anybody but on further investigation, we saw a full gown nine-band armadillo digging around the thicket of bushes.

It reminded us about the three young armadillos that came to play in the water from the irrigation system.  They scurried around in the water and can you believe this:  they rolled, yes, rolled around and over on their backs in the water spray.  They were like little children frolicking in the backyard.

Playful Armadillo
I rushed in to get the camera and the long lens.  "Use the long lens!  Use the long lens!" I urged my husband.  Why?  I didn't want themarmadillos to come charging at him.  I didn't need to worry.  The armadillos continued to play and didn't pay us any attention.  They even ran between my husband's legs!  They finally disappeared into the woods on Back Forty and we have not seen them again.

Armadillos means "little armored one" in Spanish.  The little armored one is a tenacious digger looking for grubs and insects, ants and termites.  Although they leave holes in the lawn, they are welcome to forage in my yard.  I consider them as aerating the lawn.
Nine banded armadillo

The armadillo tend to jump straight up in the air when surprised and consequently often collide with the undercarriage or fenders of passing cars according to Wikipedia.  When the armadillos are frighten, they tend to roll up into a ball or hide out in their burrows along creeks and streams.

The following information is from Texas Park and Wildlife:  Breeding occurs in July; the embryo remains dormant until November; and four (I thought it was three) young ones are born in a burrow in March.  They are always the same sex and identical quadruplets (triplets) developed from the same egg.

We still see an occasional armadillo around the property.  One stays around the shed and thick brush by the scenic creek and one has made a burrow in an outside corner of the house.  It might be the same one that is roaming.

Thank you for visiting my blog.