Thursday, February 9, 2017

Spring Pruning

The azaleas have been blooming for some time now--you would think that spring is here in full force with longer days and sunshine.  We still have another month, at least, of winter in NE Florida and March could be rather windy and cool.

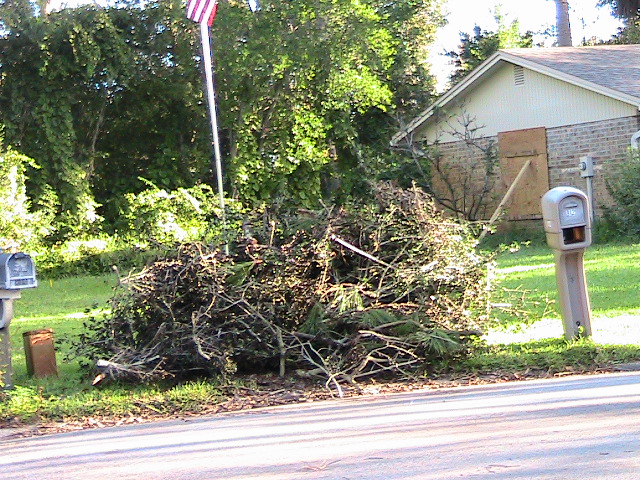
My park area on Back Forty has been so neglected that I don't know where to start the spring cleaning.  Hurricane Matthew has reorganized the landscape too and not in a helpful way.

It blew down a large holly type tree that produced a profusion of berries for the birds in the winter time.  It took some time to cut that up and remove it.


The strong hurricane winds also blew down large limbs on a huge tree on the city property near our Back Forty.  Some of the limbs ended up near our garden.

It was too precarious for us to cut and remove.  The city workers eventually came and removed all limbs and branches from their property as well as from ours.  How nice! We appreciate their hard work.


Pruning azaleas:  Prune the azaleas to your liking after they have finished blooming.  I usually cut down on the tall single rod type that has no other branches growing.  I trim down on the all too stringy branches.  If the azaleas are young, I give them some of their special fertilizer.

Pruning the Plumbago:  Last spring/summer, I drastically trimmed the plumbago around the shed while it still was blooming.  I need to be able to move around the shed to paint it.  I didn't think I see any growth and blooms again for a long time.  The plumbago came back green and healthy and bloomed.

Usually, it's a better idea to trim this plant in the fall after it has bloomed out.  But leaving in warm and sunny Florida, zone 9, it doesn't seem to matter when the plumbago gets trimmed.  It does have a tendency to spread and should e kept in check.


Pruning the roses:  My roses has decided to bloom in the late fall.  Nothing spectacular--just one rose at a time; but oh! so beautiful.  The roses should definitely be trimmed before the warm spring weather arrives.  It is strongly recommended to prune by the end of February.

I carefully remove the black spotted leaves and put them out with the yard debris that is to be collected and removed.  I cut the branches and set them out in a barrel to be emptied and removed by the Sanitation Workers.

I also clean up the ground around the ground and remove weeds and give the roses a good mound of mulch.  I hold off on the fertilizer.

This is enough work to start off the spring cleaning in the beginning of February.

Thank you for visiting my blog.

Saturday, February 4, 2017

Starting Seeds Indoors

Now is the time to sow seeds indoors for a Mach planting and the garden centers have many trays and assortments of containers available.  In addition, it is recommended that commercial soil be bought and used--not soil from the garden.  I have found it easier, less expensive, and less time consuming to wait and get transplants from garden centers than trying to start seeds indoors.

But if you like to give it a go, you will need clean containers, sterile media, seeds, and a sunny location.

The garden soil is the most important aspect of the indoor seed starting.  The reason your own garden soil should not be used is that it may carry diseases, bacteria, and weed seeds.

Another disadvantage is drainage.  Your own garden soil has a tendency to become heavy and packed after a few water sprinklers and that is hard on tender roots.

With a commercial soil mix, you have more control.  The soil is lighter and fluffier, and free of diseases.  It may contain peat moss, perlite, and/or vermicelli.

To start, place the media, soil, within 1/2 inch of the surface of the seed tray, press lightly, and moisten.  Then follow direction for planting depth on the seed packet.

Usually, a planting tray comes with a plastic see-through cover. Cover the seeds to keep them moist and warm.  As soon as the seedlings emerge, remove the cover.

Another aspect of growing seeds indoors is lighting.  The seeds and seedlings need at least 6 hours of natural or artificial light to grow.

I do believe that the prudent thing for me is to wait until later in the spring to buy plants from the garden centers and transplant them into my garden.

Thank you for visiting my blog.

Sunday, January 29, 2017

The Winter Garden


 The broccoli have been harvested and replaced by two rows of Oregon Sweet Pea Pods.  They are the peas with edible pods--ready for munching in the garden when mature.

Three PVC pipes have been erected between the rows and strings still needs to be threaded into the holes in the poles so that they may climb on and to make it easy for our picking in mid-April.


A row of red potatoes have also been planted and because of their size they were cut into smaller pieces--each one with at least one healthy eye.


The small white potatoes with well developed eyes were planted whole.


Once the potatoes are dug up, okra which is a warm weather vegetable will be planted in their place.

Somewhere in this garden plot, there will e space for Contender green beans--a sure early spring winner.


It is rather interesting that I am still plotting and planting the winter garden while I am also planning for an early spring garden.

Thank you for visiting my blog.

Sunday, January 22, 2017

The Curly Kale

Kale has become rather popular these last few years.  It is a versatile green powerhouse of a vegetable, loaded with vitamins C and K as well as many minerals.  The more it is picked, the more it grows.  It keeps very well in the garden during the cooler months but may be frozen for later use.

Curly Kale
The green curly kale gives some texture to the otherwise straight greenery in my garden and it also adds color and texture to a salad when torn or cut into small pieces.

Milo Sammas in "Dr. Earth:  Homegrown Food" writes that the "Antioxidant action of vitamin A and C help boost immune system, protect blood vessels, reduce inflammation and protect skin and lining of internal organs."

Here is an easy, delicious, and different recipe for a Kale Salad:


Remove the large veins in a bundle of kale and then blanch until wilted, cool under running cold tap water, let drain and set aside.


Cut, dice or cube an apple and peel, slice and dice an orange to combine with the kale

Vinaigrette:  In an attractive Mason jar, combine 3/4 cup of (canola) oil and 1/4 cup of (red wine) vinegar with a dash of sugar and 2 tbs of mustard.  Salt and pepper to taste.  

Make it your own vinaigrette by adding herbs of your choice and even a minced clove of garlic,

Thank you for visiting my blog and leave a message, if you like.

Sunday, January 15, 2017

Winter Time Planting of Potatoes

It is the season to plant potatoes again in Zone 9 and they should, hopefully, be ready to harvest in April.  My potatoes have a good head start: they are sprouting vigorously. I have never had potatoes with such hefty sprouts.

Last fall, my store bought potatoes were beginning to sprout so I put them in a plastic basket that I had lined with crumpled up newspaper, then put the basket in a brown paper bag, and stored them in a dark corner in the Summer Kitchen.

This is the time of the year when the fall vegetables such as broccoli, cauliflower, and cabbage are ready for harvesting to make room for the winter vegetables that need to be planted or sown.

Among the primary winter vegetables that need to be put into the ground are the potatoes that are sprouting so vigorously in my basket.


The potatoes should germinate within two weeks but that will depend on the weather.  If there is frost predicted, I put a generous helping of mulch around the potatoes and even cover up the tender greens with the mulch.  If a severe cold snap is in the forecast, I have my frost blankets available.


We had to make a detour around a cabbage that was still in the ground, but that is all right.  Once that cabbage is pulled, it will provide a spot for an herb that is compatible with potatoes such as dill, basil, oregano or rosemary plus a few others that I would otherwise plant.

Also, I am planning to sow okra when the potatoes are harvested.  The professional gardeners recommend that neither corn nor tomatoes be planted in the same place in the same season as the potatoes:  they are all heavy feeders and will deplete the soil.

Happy planting!

Sunday, January 8, 2017

A hearty Broccoli/Cauliflower Casserole

It wasn't that long ago since I harvested large heads of broccoli and left the rest of the plants to stand until I had put the current harvest into the freezer for later use. Deem of my surprise when the broccoli plants had grown small florets, not only once but twice.  How giving!

While I recently was pulling up the broccoli plants, I spied snow white cauliflower heads  peeking out from masses of tall and dense greens.  I harvested one cauliflower and gave a neighbor another but they need to be taken care of before too long.

I read a quote in the First Coast Magazine that read:  "Cooking is like love.  It should be entered into with abandon or not at all."  -- Harriet van Horne

So, here I go taking out a bag of broccoli from the freezer and let it thaw while I cut the cauliflower into bite size florets enough to serve two hungry gardeners and provide for tomorrow's lunch as well.  I spread out the broccoli and the cauliflower florets into a greased baking dish and set it aside.

I grated cheese to make a cup and then some for topping the casserole.  I also set that aside.

Here comes the abandon part:  to make a white creamy and cheesy sauce for the casserole.  In a pot I melted a generous helping of margarine and gently cooked it together with a couple of heaping tablespoons of all-purpose flour and a little mustard, stirring constantly to keep the sauce from sticking to the bottom of the pot.

I slowly added 2 cups of milk, kept stirring, and finally added the grated cheese, and stirred until the cheese had melted and the sauce was smooth.  Nice going!

Now, I poured the sauce over the broccoli and cauliflower florets, covering the vegetables, and topped it off with the left over grated cheese.

The casserole was baked in a 400 F degree oven for 39 - 35 minutes.

This creamy and hearty casserole was served with chicken and a large biscuit.  Bon appetite!


Thank you for visiting my blog and leave a message, if you care.

Tuesday, January 3, 2017

The Swedes are Coming! The Swedes are Coming!

The Swedes are coming!  The Swedes are coming and I am coming  with them too.  There are too many things going on in the garden that I like to record and share with you.

C
The Swedes are known as rutabagas in the Americas and Canada. Some say that they are a cross between wild cabbage and turnips.  Granted, they do have red tops.

Because the rutabaga grew best in cooler climates, they became popular in Scandinavia and especially in Sweden where they received their name "Swede."

In the last few years, I've grown rutabagas more or less out of curiosity.  It is not a particular popular vegetable but it has many uses.  Mainly I cube them and cook them with potatoes and they add a little extra flavor and texture to soups and stews.

Furthermore, they freeze very well when peeled, cubed, and blanched and cooled under running tap water.  Then I bag 'em and put them into the freezer for later use.


While I was searching for Swedish recipes for the holidays, this is what I found for making a rutabaga casserole:

Peel and cube about 1.5 kg (3 lbs) of rutabaga and cook until soft enough to mash.  I used some of the water that they were cooked in to moisten the mash.

In a bowl, I combined 1 dl ( 1/2 cup) of cream, touch of sugar or syrup, 1 slightly beaten egg with a dash of nutmeg, added the rutabaga mash into a baking dish and covered with bread crumbs.  I baked it for 1 hour in a 375 Fahrenheit degree oven.

Last fall, I sowed three short rows of rutabaga and thinned them out as they grew.  It takes about 7 days for them to germinate and about 72 - 100 days to maturity depending on the weather.  It is still recommended that rutabagas be sown in Zone 9.

Thank you for visiting my blog.