Sunday, November 30, 2014

First of Advent 2014

Today is the First Sunday of Advent.and let's us take a moment to light a candle and think about the upcoming season.


May peace and harmony.fill our hearts.

Saturday, November 29, 2014

From the Atlantic Ocean to the Pacific Ocean

I have from time to time written about the marine who started his ride on a horse in Surf City, North Carolina. After 7 months,  he will end his ride tomorrow at Camp Pendleton in California.  The purpose for his ride was to bring attention to Post Traumatic Stress Disorder (PTSD) that affects veterans coming home from wars.

In his posts on Facebook, hehas very well documented the plights of the veterans.  He has brought attention to the fact that each day 22 veterans take their own lives because they cannot cope with returning home to civilian life. Mostly there is no support system available for the veterans be it psychological and physical.  Hopefully, this will change.

This marine, Matt Littrell, has posted interesting and beautiful photos from his ride across this country.  He has written about his horses and he has written many time about the kindness of strangers.

Tomorrow his ride will come to an end. His posts have moved me to teas many times and it has been worthwhile and profound reading.

.Please take a look at his Facebook, The Long Trail Home, and find out about the time and place in case you are interested to meet and greet him at Camp Pendleton's South Gate in California.

Thank you for visiting my blog.

Thursday, November 27, 2014

Thanksgiving 2014

The subject for today is about gratitude, not only today but throughout the year.  Gratitude is good for your health and it improves your ability to cope with difficult people and every day stress so "they" say..

Every time I work in the garden, tilling the soil and weeding, I feel grateful that I am well enough to do it.  I feel blessed for harvesting various and nutritious vegetables throughout the year.


I feel blessed that I am able to share the abundance from the garden with senior citizens.  I am grateful that they do accept my fresh vegetables. They are doing me a favor:  those vegetables do not end up on the compost.


I am grateful and so blessed to have a wonderful partner of many years to share the gardening with me. I am grateful for family and friends.

I am grateful that I am able to write this blog.  It is good exercise for my mental health.  I am happy that so many are reading my humble blog.

Enjoy this Thanksgiving with friends and family and give those with less a helping hand and a healthy serving of your blessings whatever they may be.

Thank you for visiting my blog.

Wednesday, November 26, 2014

Falling Leaves

People make road trips to see the leaves turning and it is indeed a spectacular display of brilliant colors in red and yellow and hues in between.  It is also very nice and peaceful to walk in the woods on a windy day and the leaves come falling down.

Sara Coleridge writes:


Dull November brings the blast, 
then the leaves are whirling fast.


How true!  I went out in the car yesterday afternoon and the leaves were whirling fast further up the road. 

I am glad that we don't have leaves to rake up in our Park.  If you have leaves falling onto your grass/lawn, rake them up as soon as possible.  Don't let them stay for an extended time.  It is not healthy for the grass because the leaves cut out the natural light and encourage the growth of fungi.

Most of our trees in the Park are evergreen and whatever leaves are falling on the grass is picked up during the last mowing for the season.  Pine needles, and plenty of them, are falling down in our yard but that all right.  They make for wonderful mulch.

It is all right to wait for most of the leaves to fall and then rake them up.  Of course, with all the rain and snow it may be a long wait.  In the meantime, take a listen to Art Pepper's "Autumn Leaves" and enjoy it.


Thank you for visiting my blog.

Tuesday, November 25, 2014

Candle Making Made Easy

When I was cleaning up the sun room in time for Thanksgiving so that we could enjoy our meals overlooking the Park, I came across some large and small candles in glass jars that I almost threw out.  So much wax that was going to waste, I thought.  Why not melt it down and make new candles to decorate the table for the holidays?.

Warning:  Melting wax is a dangerous undertaking and I urge you to be cautious and exercise great care.  

To prevent the candle in a large jar from rattling or maybe even breaking, I put a small dish cloth in the bottom of the pot that I had half filled with water.  I put the candle jar onto the cloth in the pot and let it slowly warm up, simmer, and melt. I was keeping a careful watch on this pot!

To remove the hot jar with the melted wax, I simply used two pot holders and carefully emptied the wax into my smaller pot that I use for melting wax to seal my jars for jams.  (I let it stand and harden because I was not ready to make candles.)

To melt the wax, I put the pot with the wax into a larger pot with water and let it come to a slow simmer.

I used plain half pint jars for my new candles.  I bought wicks with fasteners at an arts and crafts store and glued a fastener with the wick to the bottom of each jar.

I am planning to make my own wicks and using a bolt or a nut to fasten to the bottom.  It won't show.

Also, for one of the candles, I broke up a red crayon and added it to the melted wax in my pot to color the wax, stirred it gently with a wooden stick, and made a pink candle that my granddaughter will like, I'm sure.


I used glass jars for my new candles but small cans may be used as well. Make your own borders and labels or paint the cans if you like. Enjoy your own homemade candles..

Thank you for visiting my blog.

Friday, November 21, 2014

Mulled Wine

In one of my readings, I came across a reference to Mulled Wine and I wondered if there was more to it than to heat the wine, sugar, and cinnamon.  Perhaps.  For starters, it gave me an opportunity to stock my spice rack and buy a few bottles of red wine.

I found an interesting reading about "fine" sugar.  I read that confectioner's sugar was out because it contains starch and that is not part of the mulled wine.  Another source suggested that you "pulsate" ordinary processed white sugar in a blender but cautioned that the course sugar may scratch the plastic pitcher.  It was suggested that you grind the sugar using a mortar and that worked for me. (Course sugar will melt, too.)

I love spices but I don't use them all the time.  Some say that the spices lose their potency if they sit on the shelf too long.  If that is the case, I use more of the spice, e.g. instead of one teaspoon, I may use two teaspoons.  I don't throw out the spices because some of them are rather expensive.


I have found that I like the herbs and spices in the Hispanic section in the big box stores. There seems to be a better and larger selection at less expensive prices.  They also have the spices that are most appealing to me.  The other day, I bought cinnamon sticks, whole cloves, Star anise, fennel and coriander seeds.

Oh, yes!  The mulled wine:

In a small pot I combined grated orange rind and the juice of two small Satsuma oranges (Clementines, Tangerines),  added about 1/3 cup fine sugar, a cinnamon stick, 8 - 10 whole cloves, and a dry Bay leaf.  I covered this with a little wine and let this come to a boil and then turned it down to simmer for a few minutes.

Discard the spices so that you have a smooth wine syrup.  The alcohol has been burned off and this can be stored for later when you want to add the rest of the one bottle of wine or more to heat and serve.  You do not want to burn off the alcohol, or do you?

I feel that making mulled wine is your personal choice:  use oranges, sugar, herbs, and spices that you like and use the red wine that you like and again let the alcohol cook off or not.  Drink it for the tast it.
e and enjoy.

Thank you for visiting my blog.

Wednesday, November 19, 2014

The First Freeze

We are barely into the middle of November and the weathermen are warning about a freeze, even along the north east Florida coast.  Are they kidding?  The Ocean is supposed to keep us warm.  The national weather forecast warned that Pensacola on the panhandle would dip down to 29 degrees.

It is supposed to be short but cold enough to use the frost blankets.  My husband made a tent over the tomatoes and the pepper plants that are still blooming and producing.  The potatoes have large sprawling vines and we are leaving them uncovered.  We should have potatoes as soon as the vines have wilted naturally in a few weeks.

The mustard and turnip greens are supposed to acquire a sweeter taste after a frost so they will survive this cold spell.  I sowed the Oregon Pea Pods recently but they have not sprouted yet, thank goodness.  The cold would not affect full grown vines but I am concerned about tender plants and blooms.

It is helpful to water the garden thoroughly before frost or freeze is expected.  The moisture in the ground will keep the soil warm especially under a tent.

It is recommended to bundle up hibiscus plants.  They are susceptible to prolonged cold weather.  The same is true for poinsettias.

The oranges are gaining their distinct color and maturing on the trees but we are not covering them up.  The peel is providing protection against this fast freeze.

Mulching flower beds and garden beds will help keep the moisture in the ground and hopefully prevent plants from freezing.

Finally, don't forget to take care of yourself and bundle up in layers of clothing.

Thank you for visiting my blog.

Thursday, November 13, 2014

Arugula or Garden Rocket

Arugula is also known as Garden Rocket and I have no idea how it got that name.  It is a green leafy vegetable of Mediterranean origin and may be used in many ways, not just in green or tossed salads.

The arugula is a cool-season, fast growing, crop that is best harvested before blooming although the blooms may be eaten too.  It takes 5 to 8 days for the arugula to germinate and about 35 days to harvest time.
 
The arugula is similar to mustard greens, spinach, and kale.  It looks very much like dandelion leaves.  The young tender leaves are sweet in flavor and less peppery or bitter in contrast to the more mature leaves.

I have used the arugula instead of lettuce in salads and on sandwiches.  It is a great source of vitamin A, C, and K.  I also use the arugula in soups and strews treating it pretty much like spinach.

As with leafy green, the arugula is somewhat difficult to keep fresh for a longer time in the fridge, but I understand that it may be blanched, cooled, and packed for the freezer.  I have to try this myself because I have a good crop that will mature faster than I can eat.

Thank you for visiting my blog.

Tuesday, November 11, 2014

Veterans Day 2014

Once again, we raise the flag and participate in parades in honor of the Veterans who fought so fiercely and valiantly for our freedom and our country.  Not only did they keep us safer, they tried to keep each other from harm's way.

On Facebook, The Long Trail Home, I have followed an awesome former Marine Infantry man riding horseback across the country to raise money for wounded veterans.  He is also bringing awareness to Post Traumatic Stress Disorders (PTSD) that veterans may suffer when they return home from various wars.

I have learned so much from this marine about veterans, about horses, this beautiful country, and the kindness of the people.  His posts have brought me to tears many times.  Please, read his posts and find out for yourself about veterans.


Thank you for visiting my blog.


Friday, November 7, 2014

Green Garden Salad

At this time, I have various greens growing in the garden.  The leaves are young and tender and ready to be used in a salad with homemade dressing.  These garden greens do well into the late fall or early winter and a slight frost will only improve their taste.  Let me share with you some of the greens that I do have:  kale, turnip, and arugula.

I am really looking forward to my five plants of kale taking off and growing so that I can seriously start using the leaves in salads and for cooking.  I even sowed more kale to supplements the few plants.

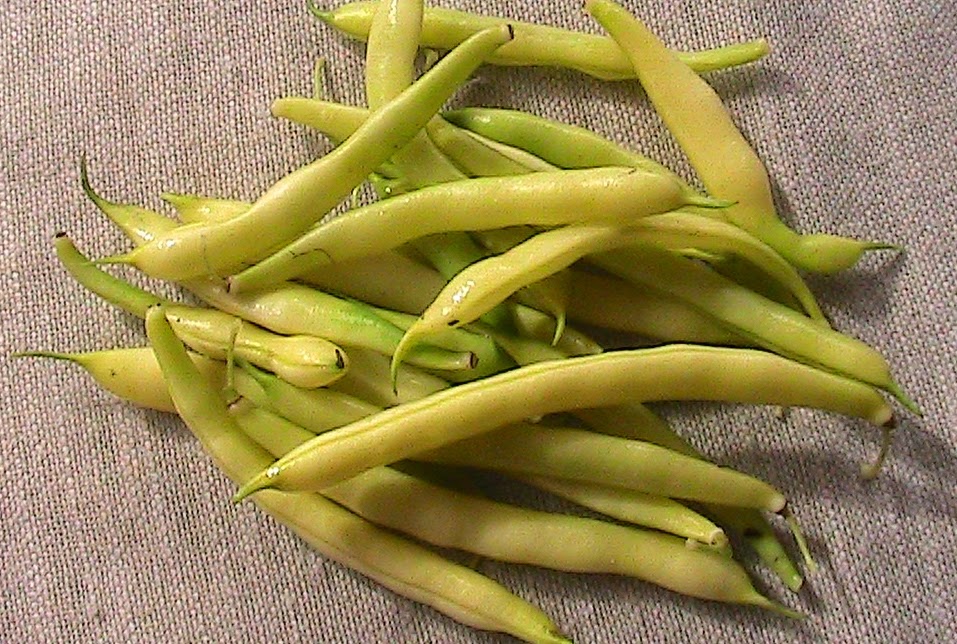
Early this fall, I emptied a packet of turnip seeds in a small area and every one of the seeds are producing nice and healthy greens.

I also had a packet of arugula that I sowed in a patch.  Nothing much was happening with them until I gave them a sprinkle of 10-10-10 fertilizer and last evening, I was surprised to find a healthy and dense crop.

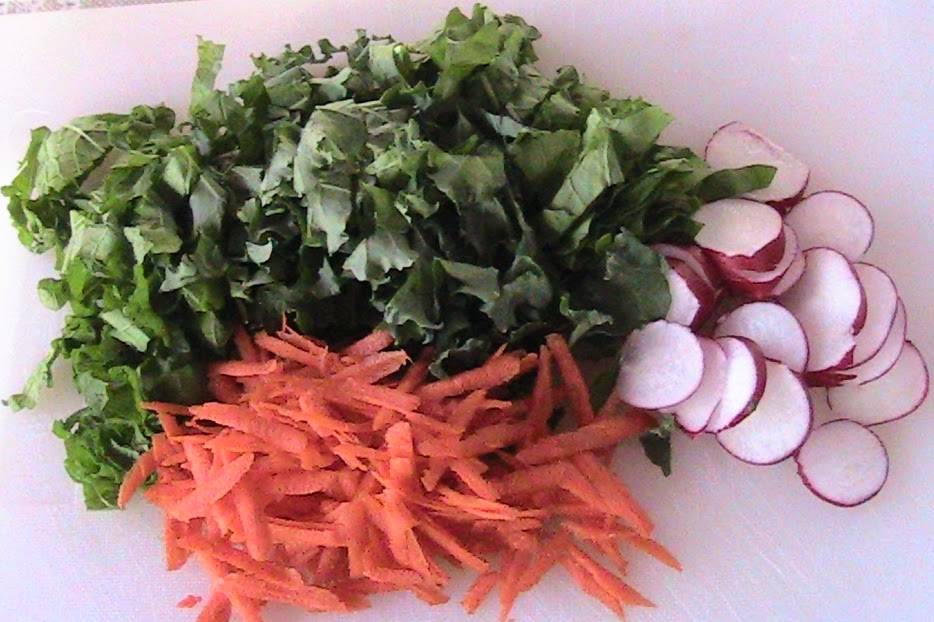
As the sun was setting yesterday, I was out in the garden and gently breaking off kale, turnip greens, and arugula for a salad.  Without washing the greens, I rolled them up and sliced them into strips.


Here are two very simple dressing recipes that go very well with salads:

2 tbs canola oil, 2 tbs fresh orange juice, 1 tsp chili powder, and 1/2 tsp (sea) salt.  Stir together and let it stand a few minutes to blend the ingredients.  As an alternative, use lemon juice, paprika, or any other spice that you like.

The other vinaigrette consists of 2 tbs each apple cider vinegar and canola oil, 1 tbs mustard, 1 tsp onion powder, salt and pepper to taste.  As an alternative, use red vie vinegar, Dijon mustard, or finely chopped shallots or onions.

I also pulled a few radishes from the garden, sliced them up, and added to the salad.  I couldn't stop there, I had to grate a carrot to add to the mix.  My green salad is no longer so green.; it grew.  This is a lot of roughage.

When serving the Green Garden Salad, go easy on the dressing.  Do create your own green garden salad as well as dressing and share your recipes and suggestions.

Thank you for visiting my blog.

Thursday, November 6, 2014

Yellow Wax Beans

Yellow Wax Beans is the generic and most common name for a variety of the wax bush beans.  They come in different shades of yellow: some are light greenish and others are pale yellow.

I sowed my wax beans in early September and I have been harvesting them for several weeks. They mature so fast if left alone and I did not pick them when they were young and tender, but the more mature yellow beans are fine, too.

The yellow wax beans do add color to a bean salad mixed with their green relative and red kidney beans.  Otherwise, I treat the yellow beans as I do the greens beans:  cook them in a little bit of salted water and serve.  How is that for imagination?

Yellow Wax Beans

The yellow beans will also freeze well.  I prefer to snap off the ends of the beans, blanch them in water, cool under running cold tap water, pack in plastic bags or containers and put them into the freezer for later.

This year I sowed the seeds in double rows next to the green beans and it turned out all right.

Next year, I believe that I will plant one double row of green beans, two rows of cabbage, and the yellow wax beans. This way the beans should be harvested in time for the cabbage to really start to head up and it will give me room to maneuver on either side of the cabbages.

One sure thing about beans, green or yellow, is that you can't go wrong whether it they are planted in the  spring or fall.  It is more or less a quest of finding the beans that taste good and looks good.

Thank you for visiting my blog.

Tuesday, November 4, 2014

Crispy Kale

Because of the chilly weather, we stayed inside the other day and watched a garden/cooking show on a PBS channel and the gardener/chef was making Crispy Kale.  It looked interesting and I was learning something new. So I thought that I would give it a try because it was rather simple to do.

Kale
I went out to the garden to check on my kale and they still had some growing to do but I picked a few leaves.  I also picked a few leaves of mustard greens and Japanese red mustard greens.  In addition, I also picked a few broccoli leaves to make a nice bouquet of garden greenery.

I really didn't need very much since the leaves had to be spread out in a single layer on the cookie sheet.

First I washed off the garden soil, drained, and dried the green leaves and then removed the thick stems and veins.  I dried the leaves thoroughly with a dish towel.

At this point, I drizzled the dried green leaves with Canola Oil (use Olive Oil, if you prefer) in a bowl and made sure that I had them all oiled.  I mixed some spices together: garlic salt and onion salt, cayenne, and paprika.  Go easy on the spices and go easy on the oil.  I should have used just salt and not too much of it either.  

On a cookie sheet, I spread out the leaves and made sure they didn't lay on top of each other.  I set the oven on 300 degrees F and let the greens bake for about 15 minutes or until crisp.

The greens came out crispy and brittle.  

My husband tasted some of them and he said that it wasn't the best thing that I had made in the kitchen.  He thought that I had used too much spice.  Hmm!  I have to think about making this again.  If you try it, let me know what you think.

Thank you for visiting my blog.